Good chicken coop design feels like a breath of fresh air—for you and your flock. Once you get the inside right, chores get easier, eggs stay cleaner, and your hens feel calmer all day long. A well-planned interior helps air move where it needs to, keeps moisture from building up, and gives your birds safe, comfortable places to rest and lay. It also makes a huge difference in visibility—because chickens don’t see well in the dark, so lighting placement matters more than you think. If you’re trying to upgrade an existing coop or designing one from scratch, these ideas will give you practical, easy wins you can apply right away.
Quick Answer
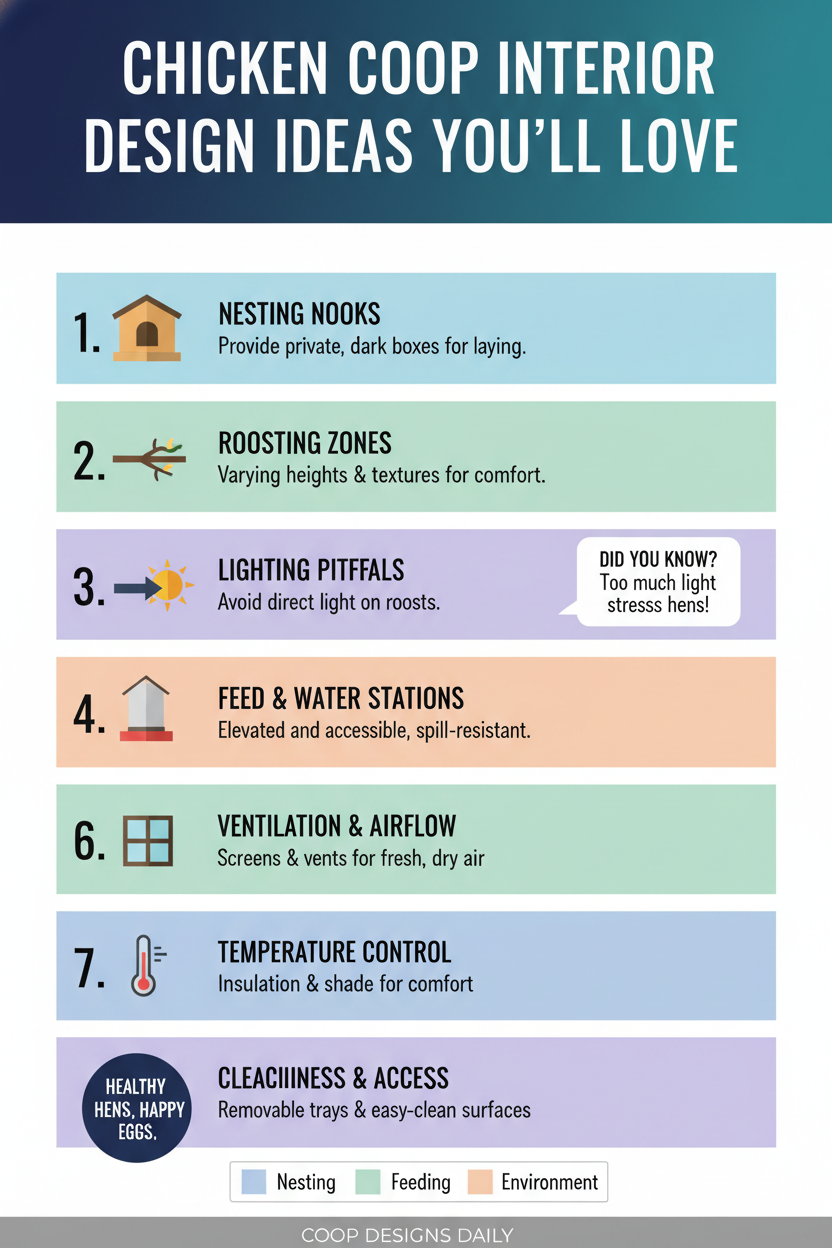
Here are the best chicken coop interior design ideas I love most: a ventilation-first layout, comfy roost zones, careful lighting placement, nesting boxes that fit your cleaning routine, and an interior plan that makes daily maintenance simple.
Key Takeaways
- Design the inside around ventilation, roosting, nesting, and access to food/water.
- Don’t rely only on pop doors for airflow—when pop doors are the main ventilation, add higher vents too.
- Keep bright lights away from roosting areas; chickens need safe movement, not glare.
- Use low-intensity lighting (just enough to read a newspaper at bird level) and run it in the morning.
- Choose nesting boxes that work for your space and help keep eggs clean and less likely to break.
- Arrange everything so you can clean fast, without blocking airflow openings.
1. Start With a Healthy Interior Layout
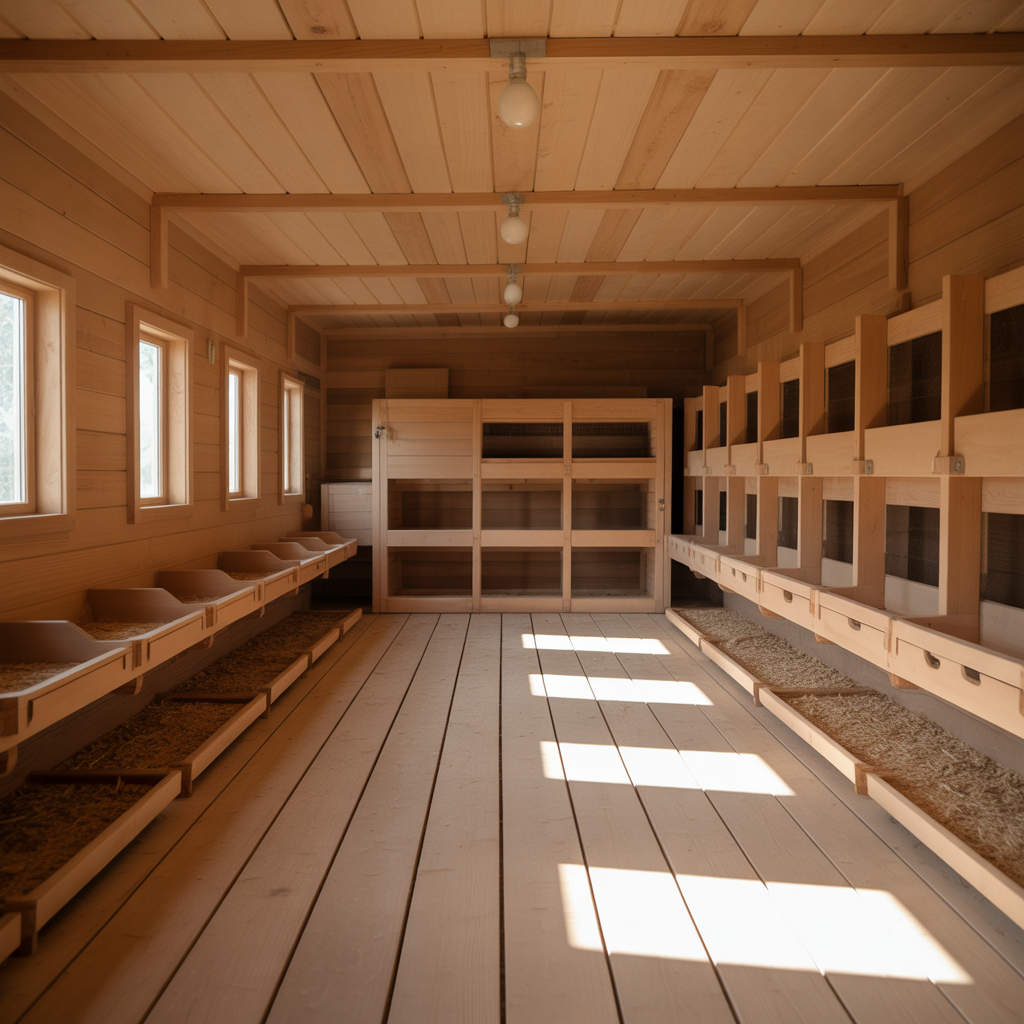
Before I add any “cute” details, I start with how the coop works. The inside layout should be built around four jobs: airflow, roosting, nesting, and daily access to feeders and waterers. When those parts are planned well, the whole coop becomes easier to manage.
What I love about a strong interior layout is that it reduces “mystery problems.” For example, if the coop gets damp or smells musty, it’s usually because air isn’t moving well where moisture builds up. Since dust and moisture tend to mix into the air and then rise, I plan airflow so fresh air can enter near where it’s needed and stale air can leave higher up. That one change alone can make the coop feel noticeably better.
Here’s how I plan my zones in a simple, practical order:
- Choose your ventilation path first (where air will enter and exit).
- Place roosts where birds can rest comfortably and move safely.
- Add nesting boxes in a quieter, more private section of the coop.
- Leave enough space for me to reach food/water and clean without climbing or squeezing.
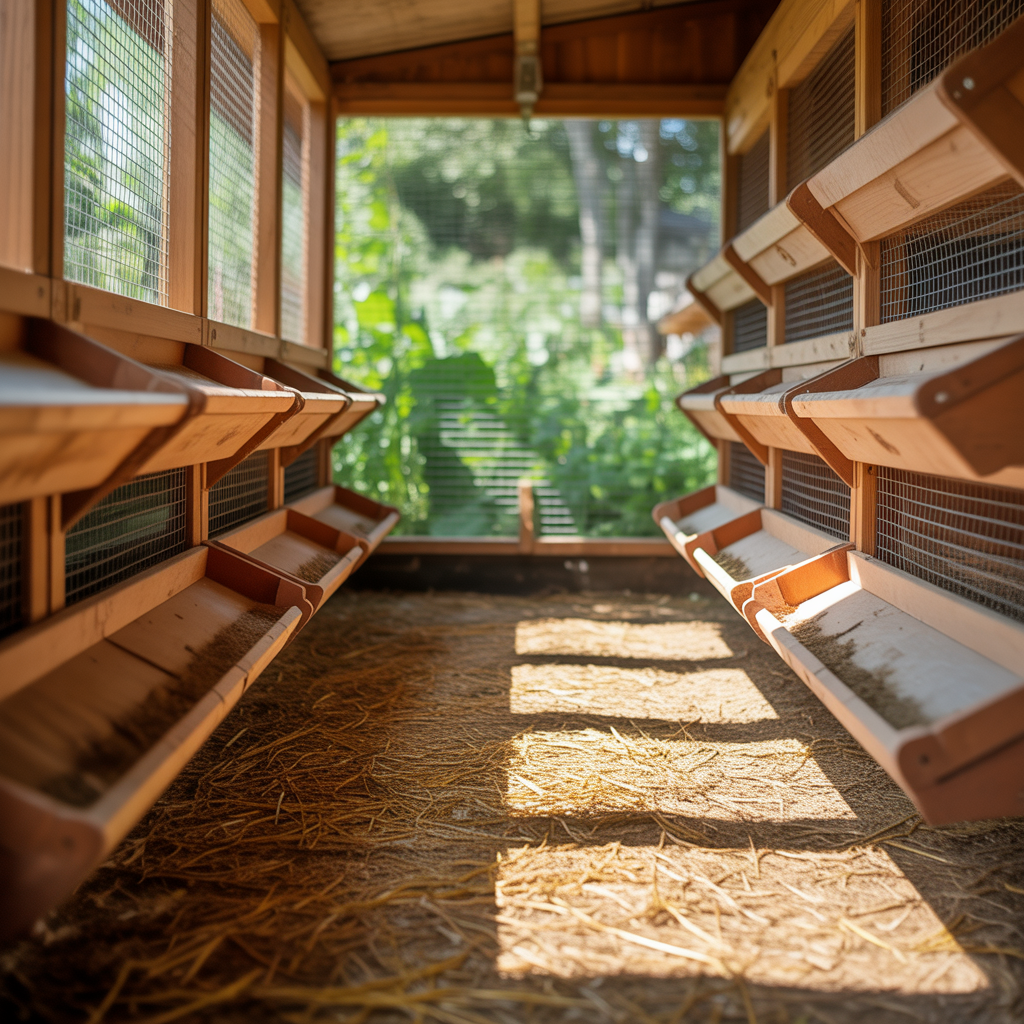
2. Ventilation-First Design Ideas (So the Coop Stays Fresh)
Ventilation is one of those “not glamorous but everything” parts of chicken coop design. If you get this right, you avoid a lot of stress later—like wet bedding, ammonia smell, and hens that seem less comfortable.
I like thinking about ventilation in “levels.” Many coops use pop doors for airflow near the base, which can be great—especially in larger coops. But research and coop design guidance often point out that pop doors shouldn’t be the only ventilation path. In small coops, pop doors can end up being the main or only airflow, and that’s when I add something higher up.
A ventilation plan I often recommend:
- Use pop doors as low ventilation openings (especially if you already have them).
- If pop doors are the main or only ventilation, add higher vents to pull fresh air through the coop more effectively.
- Combine openings at different heights to help reduce stale air pockets.
So what does “higher vents” look like in real life? It can be something as simple as a vent placed higher on the wall or near the upper portion of the coop structure. The goal is to help airflow move through the coop as moisture and dust naturally rise, instead of letting them hang around.
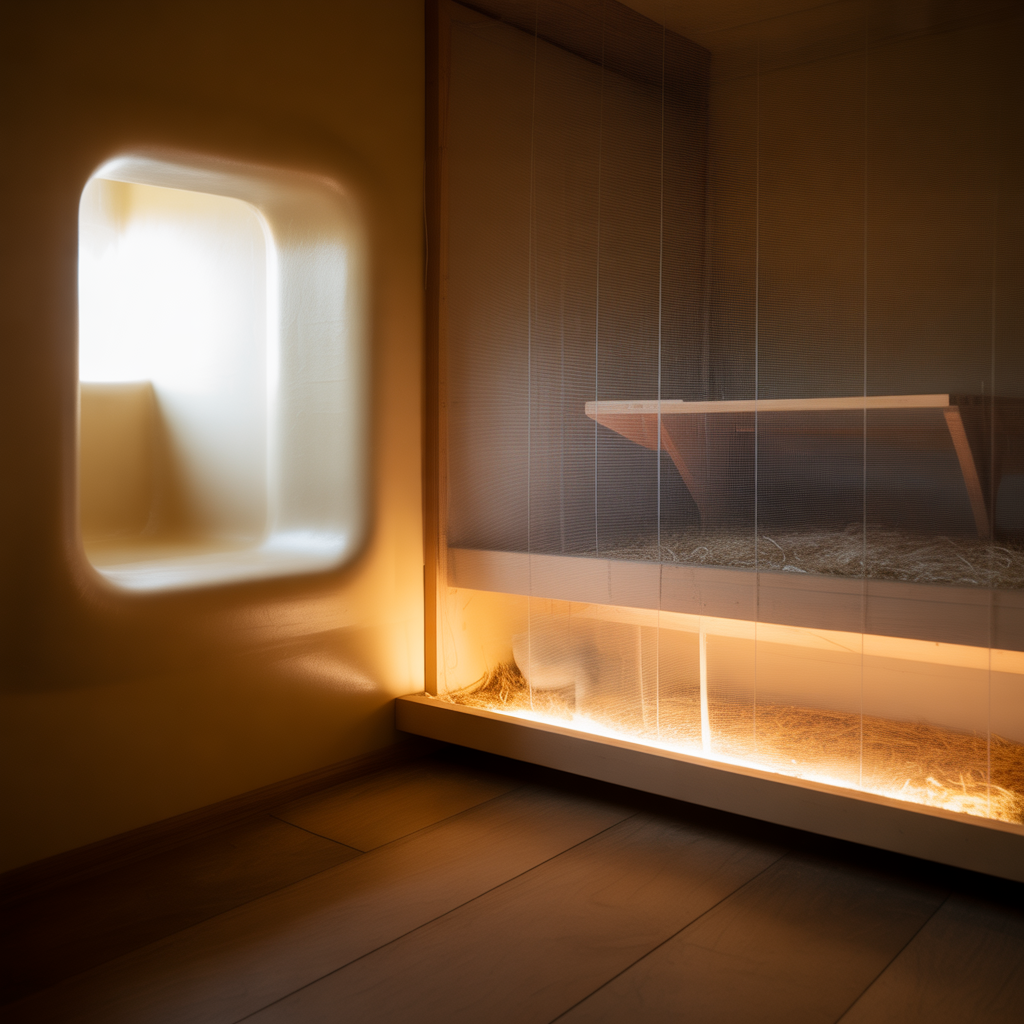
3. Roosting Zones That Promote Comfort (and Avoid Lighting Pitfalls)
Roosting is where hens spend a lot of their time—resting, settling in, and sleeping. When roosting zones are designed well, birds feel secure and you get fewer “crowding” problems.
Placement matters. I try to position roosts so they’re comfortable and not blasted by harsh light. When I think about roosting zones, I’m always asking: “Will my hens feel calm here?” Chickens can startle easily, and they also need a layout that helps them move between roost, nests, and the food/water area safely.
Light is where people often make mistakes. Even if you’ve got lighting installed, placing bright lights directly over roosting bars can create glare and stress. Instead, I aim for lighting that helps chickens navigate—but doesn’t make roosting feel exposed.
My go-to roosting approach:
- Keep roosts positioned so hens can access them without obstacles.
- Avoid harsh glare directly above roost bars.
- Make sure the coop layout allows chickens to travel between zones (roost ↔ nests ↔ feeders/waterers) without getting trapped in tight corners.
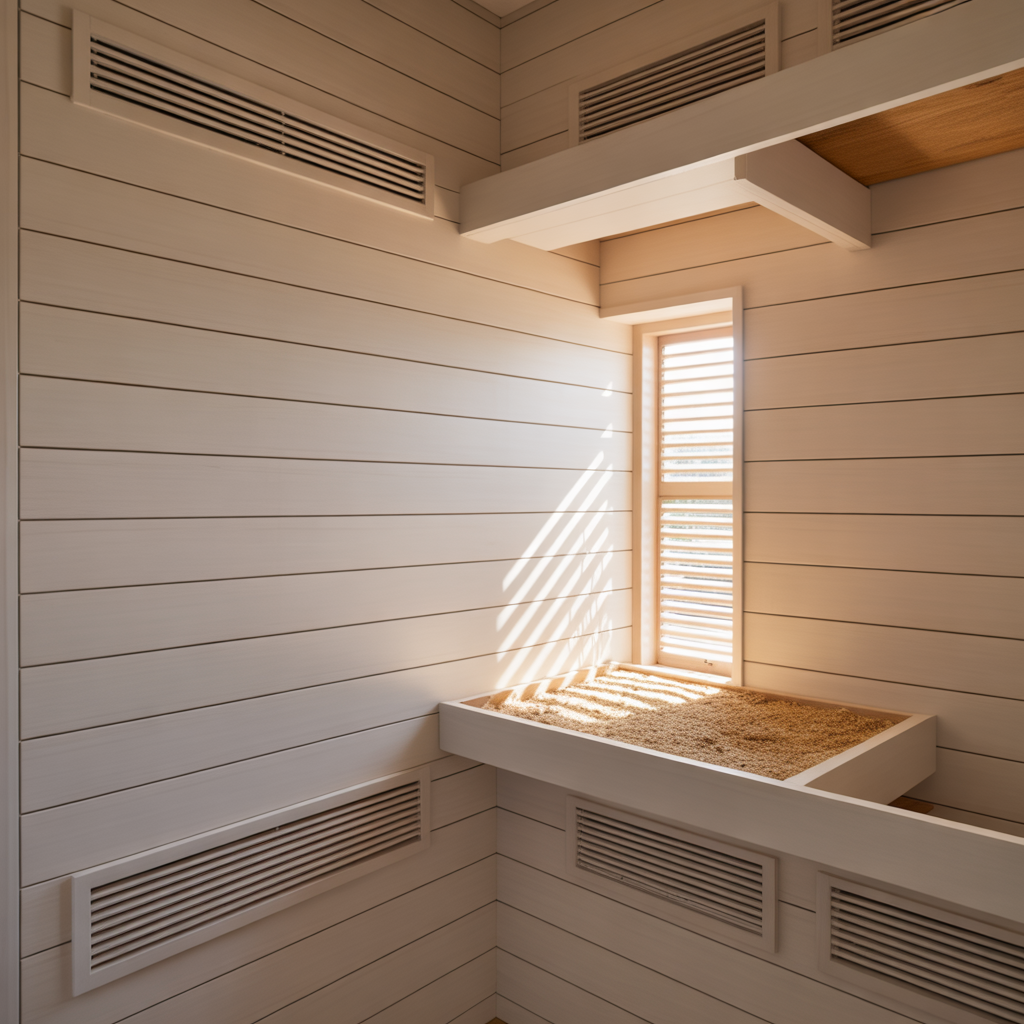
4. Lighting That Improves Visibility Without Stress
If you’ve ever walked into a dim coop at dusk, you know how important light is. Chickens don’t see well in the dark, so lighting helps them move around safely and find their essentials—like food and water. But lighting can also backfire if it’s too bright or placed in the wrong spot.
Here’s what I follow: I use low-intensity lighting. A helpful rule of thumb I like is lighting that’s just bright enough for a person to read a newspaper at bird level. That kind of light supports movement without making the coop feel harsh.
When I run lights matters too. The idea is to keep artificial lighting aligned with normal behavior: hens roost naturally as the day ends. So I prefer running the light in the morning, rather than blasting brightness late at night.
And placement is key. I place lights above feeders and waterers, because that’s where the “help me find it” moment happens. At the same time, I create a few shaded areas so hens can escape light if they want. That simple option helps hens feel like they have control over their comfort.
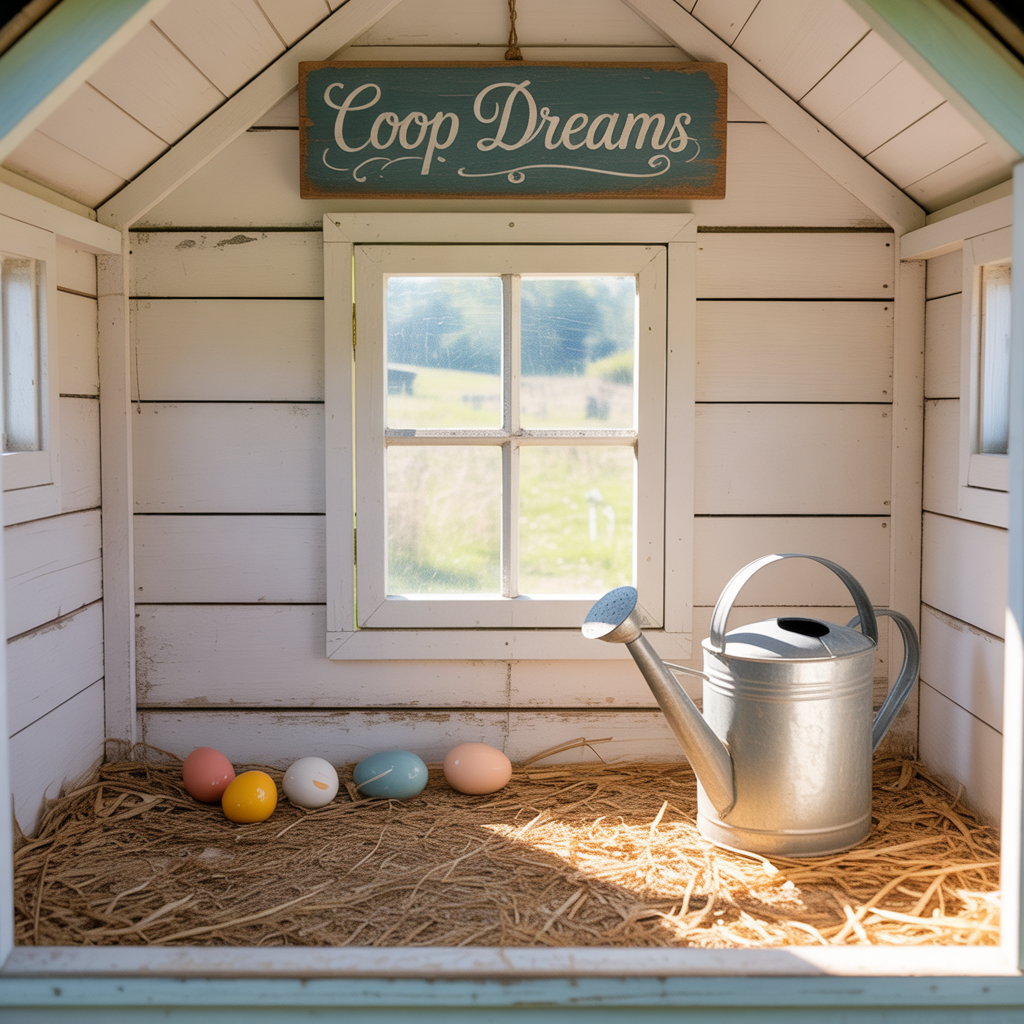
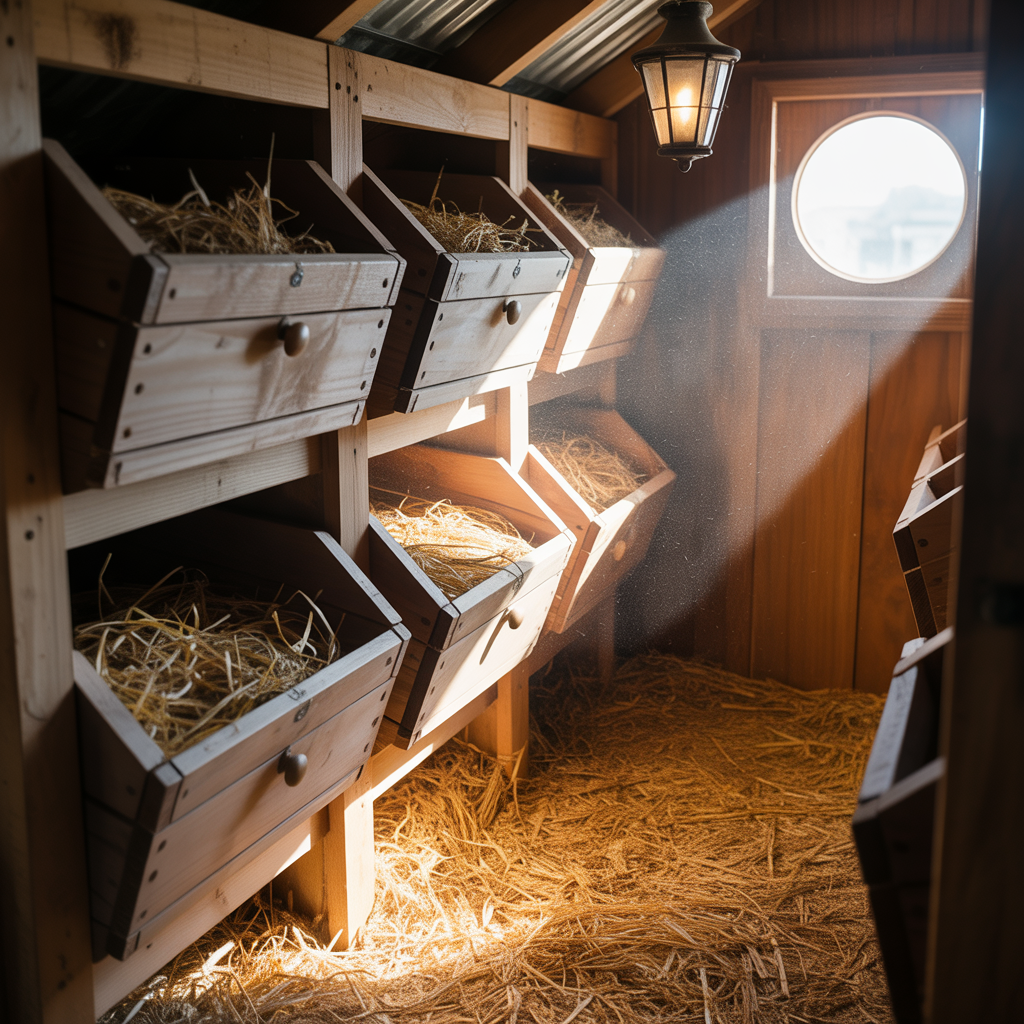
5. Nesting Boxes With Practical (and Pretty) Options
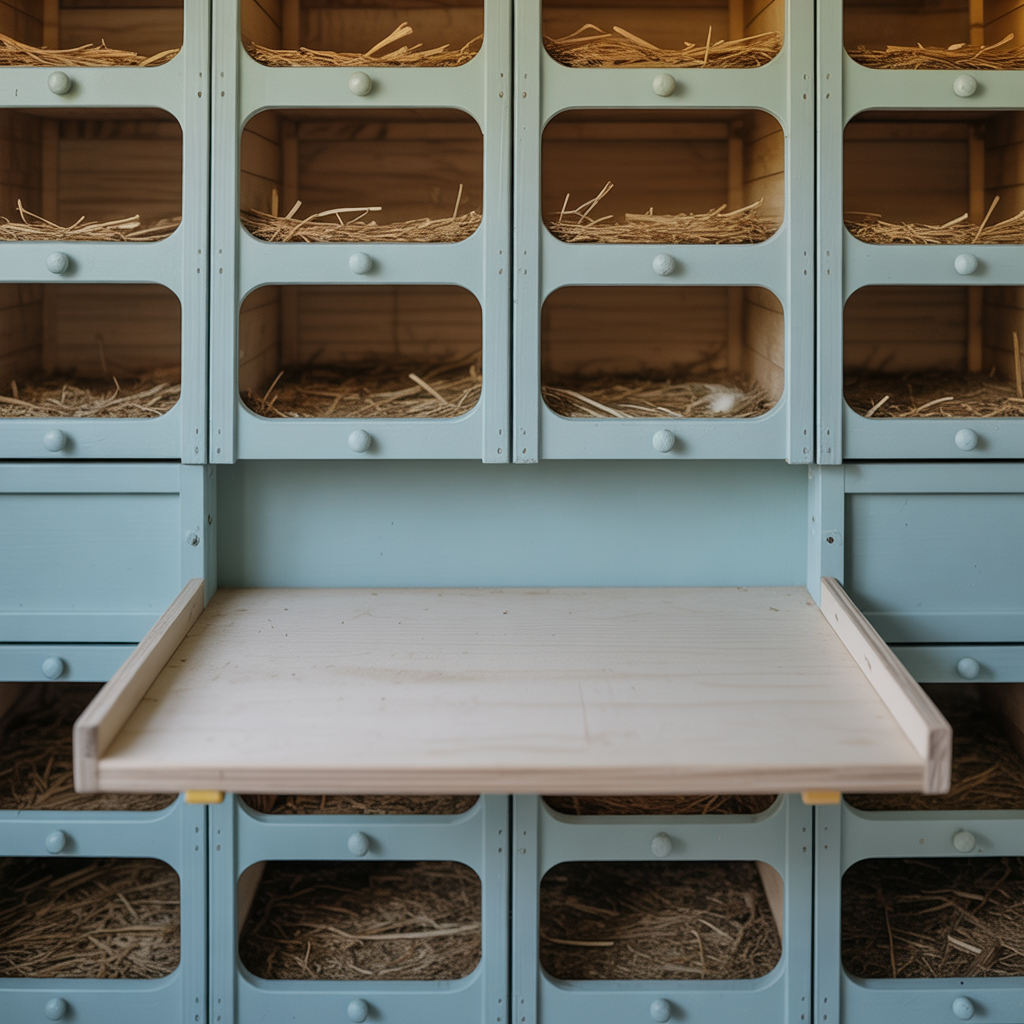
Nesting boxes can be adorable—or they can be frustrating if they don’t match how your hens choose to lay. I like to think about nesting boxes in terms of two things: comfort/security for hens and ease of cleaning for me.
You’ve got lots of styles to choose from. One popular and budget-friendly option is repurposed DIY designs like plastic totes turned into nesting boxes, where you cut an entry hole so a hen can go in and settle. These can work well, especially if you’re building your coop in phases.
Another option is covered or custom cubbies—some people even add features like curtains to make the space feel more private. Privacy can matter because hens often prefer nests that feel secluded.
I also consider whether a design includes a perch in front. Some setups don’t include one, and that can affect egg cleanliness. If hens hop in and out without a front perch or landing spot, eggs may be more likely to get dirty or, in some cases, broken. If you’re aiming for “clean egg” design, this is a detail worth planning.
Finally, if you’re training new pullets or managing a temporary situation, I like using moveable nesting options. Basic, moveable setups can be a lifesaver when you’re figuring out flock behavior.
6. Build the Interior Around Easy Daily Maintenance
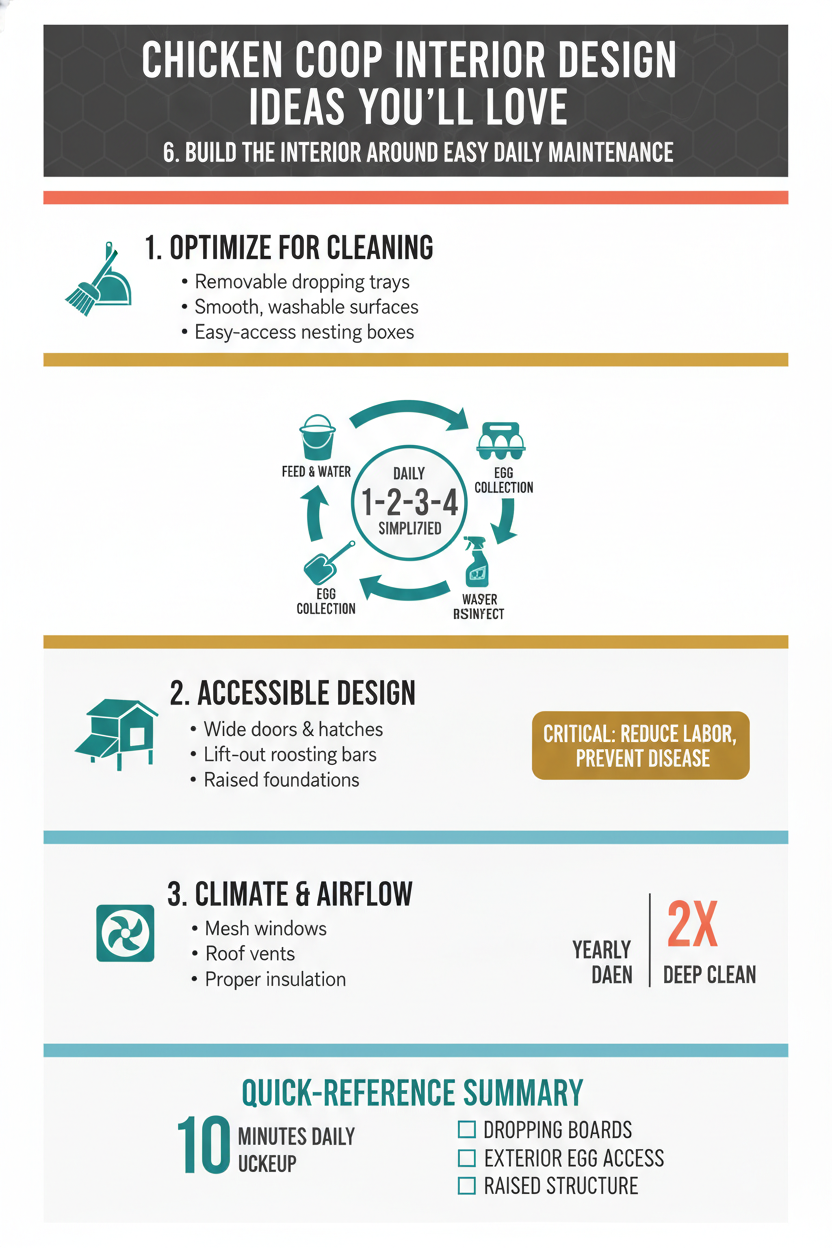
A coop interior you “love” should also be a coop interior that doesn’t make you dread chores. The best design is the one that lets me do daily tasks quickly: refilling water, topping up feed, checking bedding, and cleaning nesting boxes.
When I arrange the interior, I keep three practical rules in mind:
- Nesting boxes, feeders, and waterers should be reachable without awkward climbing.
- Ventilation openings must stay unobstructed, meaning nothing should block airflow pathways.
- Lighting should support the chores I do—while still letting hens have shaded, calmer areas.
So rather than building the inside like a maze, I plan for straight access. If I can reach a nesting box without moving tools, I’m more likely to keep up with cleaning consistently. Consistency is what keeps bedding drier and nesting spaces fresher.
Also, I don’t forget that lighting placement affects my routine too. If lights are aimed toward where I’m working, I can spot issues sooner—like wet spots or soiled bedding—before they turn into a bigger problem.
7. Style Meets Function: Create an Interior You’ll Love
Let’s be honest: I want my coop to look nice. But the “pretty” part has to serve the chickens, not fight them. The best-looking coops are usually designed around welfare needs—airflow where it matters, secure nesting, and lighting that helps hens feel safe rather than stressed.
For me, style is about choosing finishes and materials that support a clean, low-stress setup. I’m not trying to build a fancy showroom; I’m trying to create an interior that feels cohesive and intentional. When every zone is planned—ventilation, roosting, nesting, feeding—it naturally looks better too, because the layout makes sense.
Some design moves that help both style and function:
- Keep zones clearly separated so hens know where to go.
- Use materials that are easy to wipe down and maintain.
- Avoid clutter in airflow paths so the coop “breathes” properly.
- Make nesting areas feel more private through shape, placement, or simple coverings.
If your coop interior feels calm and organized, you’ll probably notice your flock looks calmer too. That’s the best “design” result I can ask for.
8. Make Ventilation More Effective by Mixing Airflow Heights
This is one of my favorite deeper upgrades because it’s so practical. Stale air doesn’t always behave like we expect—especially once dust and moisture are in the mix. A smart design creates airflow that moves through the coop instead of staying trapped.
When you combine openings at different heights, you help the coop reduce stagnant pockets. Since dust and moisture can mix into the air near where air enters and then rise, it makes sense to let fresh air in near the lower level and allow exhaust higher up.
If you’re working with a small coop and already have pop doors, I’d treat that as only part of the ventilation story. Add a higher vent and you’ll often see improvement in the coop’s overall feel—less dampness, fewer odors, and a more comfortable environment.
This idea is also useful in larger coops. Even when pop doors provide a major fresh-air entry point near the base, I still like having higher ventilation so airflow can complete the loop.
9. Choose Nesting Box Layouts That Support Cleaner Eggs
Even if you have great nesting boxes, egg cleanliness can still be a challenge. I focus on the “hen experience” and the “egg path” between the hen and the nesting area.
Here are the layout details I watch:
- Nesting boxes placed so hens can get in easily without hopping awkwardly.
- Designs that include landing/perch logic when appropriate (or at least a safe, stable entry).
- Enough space inside the nesting box so a hen settles without scraping the egg area.
Some DIY designs (like cut-tote nesting boxes) are simple and effective, but I still look at how the hen enters and where she ends up when she’s laying. If the entrance is too low or the space is too open, eggs may be more likely to get kicked around. On the other hand, a more enclosed, secure-feeling setup can reduce mess.
And if you prefer covered designs, a covered/cubby approach can make the space feel like a true nest. That feeling of security can help hens use the nesting areas consistently, which is the real key to collecting cleaner eggs.
10. Use Lighting Like a Safety Tool, Not Just a Growth Trick
Some people treat coop lighting as a simple switch: turn it on, get results. I prefer a more thoughtful approach. Lighting is a safety tool first—because chickens need visibility to move around, access water, and find feed.
A few lighting choices I always make:
- Low intensity (the newspaper-at-bird-level guideline is a great target).
- Morning timing so hens can still behave naturally as the day ends.
- Placement above feeders and waterers to help when hens are actively eating/drinking.
- Shaded retreat spots so hens can opt out of light whenever they want.
This creates a coop that feels gentle rather than harsh. And honestly, that’s usually when I see fewer weird flock behaviors tied to lighting stress.
Common Mistakes
- Relying on pop doors as the only ventilation in a small coop, without adding higher vents for airflow.
- Blocking vents with boards, bedding, or clutter, which stops the coop from “breathing” properly.
- Placing bright lights directly over roosts, creating glare where hens rest.
- Using lighting that’s too strong for the space, rather than keeping intensity low and supportive.
- Choosing nesting boxes that are hard to access or difficult to clean regularly (then cleaning gets delayed).
- Ignoring the front perch/entry setup and ending up with dirtier or more easily broken eggs.
- Designing the inside layout like a storage space instead of a flow path for hens and a clean route for you.
FAQ
What’s the most important interior design feature for a chicken coop?
For me, it’s ventilation first. A coop that stays fresh and dry makes everything else easier: hens look calmer, bedding stays better, and the coop smells less.
If my coop has pop doors, do I still need extra ventilation?
Often, yes—especially if pop doors are the only ventilation. When pop doors are the main airflow, adding higher vents helps pull fresh air through and reduces stale air pockets.
Where should I place lights inside the coop?
I place lights above feeders and waterers to help hens find essentials. I also keep some shaded areas so hens can escape the light if they want.
How bright should coop lighting be?
A useful guideline is just bright enough to read a newspaper at bird level. That gives visibility without creating stressful glare.
Are DIY nesting boxes (like tote bins) a bad idea?
Not at all. Repurposed DIY nesting boxes can work well if they give hens a secure entry space and if you can keep them clean. The key is how the hen uses the nest, not just the materials.
How can I help ensure my eggs stay cleaner?
Focus on nesting box setup and entry behavior. Designs that include a safe landing/perch logic can reduce scrambling and egg-kicking. Also, consistent cleaning matters—so choose a layout that’s easy for you to maintain.
Conclusion
I love chicken coop interior design because the best upgrades don’t just look good—they make the coop healthier, calmer, and easier to run. When I plan the inside around ventilation, roosting comfort, smart lighting, and practical nesting boxes, everything clicks: airflow improves, hens feel secure, and my daily chores get faster. Start with the basics, make a few focused changes, and you’ll end up with an interior you genuinely enjoy—one that your hens will thrive in too.

Samuel Michael
I've have been involved in Backyard Farm for over 15 years, especially livestock and market gardening. I blog at my free Time and ive My most helpful thoughts on this blog.

