Last updated: January 15, 2026
Key Takeaways
- Simple ingredients: Only pumpkin puree, oats, egg, and flour create nutritious dog treats your pet will love
- Health benefits: Pumpkin provides fiber for digestion while oats offer protein and essential nutrients
- Easy preparation: Mix, roll, cut, and bake in under 45 minutes with minimal cleanup
- Storage friendly: Homemade treats stay fresh for one week at room temperature or three months frozen
- Cost effective: Making treats at home costs 60-70% less than premium store-bought options
Quick Answer
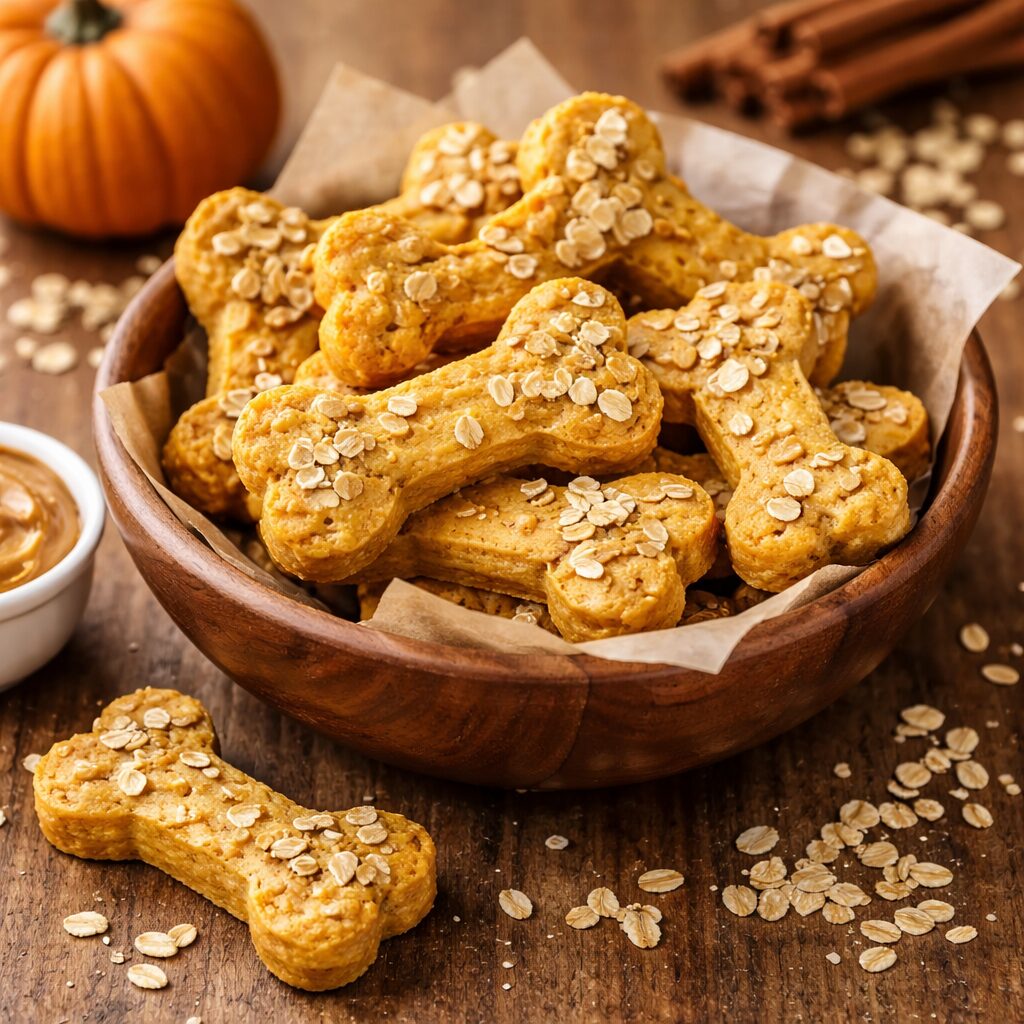
Homemade Pumpkin Dog Treats with oats combine pumpkin puree, rolled oats, one egg, and whole wheat flour into a simple dough that bakes into healthy, digestible treats. Mix the wet ingredients, blend in dry ingredients, roll the dough, cut into shapes, and bake at 350°F for 20-25 minutes until golden brown.
What Makes Pumpkin and Oats Perfect for Dog Treats?
Pumpkin and oats create an ideal foundation for homemade dog treats because both ingredients offer specific health benefits while remaining gentle on canine digestive systems. Pumpkin contains natural fiber that supports healthy digestion and can help with both diarrhea and constipation in dogs.
Key nutritional benefits include:
- Pumpkin: High in vitamin A, potassium, and beta-carotene while being low in calories
- Oats: Provide protein, B vitamins, and soluble fiber that supports heart health
- Natural sweetness: Pumpkin’s mild sweetness appeals to dogs without added sugars
- Easy digestion: Both ingredients are gentle on sensitive stomachs
Choose this combination if your dog enjoys softer textures or has mild digestive sensitivities. Avoid this recipe if your dog has grain allergies, as oats contain gluten-like proteins that some dogs cannot tolerate.
Essential Ingredients for Homemade Pumpkin Dog Treats with Oats
The basic recipe requires only four main ingredients that you likely have in your pantry. Each ingredient serves a specific purpose in creating treats with the right texture and nutritional value.
Core ingredients:
- 1 cup pure pumpkin puree (not pumpkin pie filling)
- 1/2 cup rolled oats (old-fashioned work best)
- 1 large egg (binds ingredients together)
- 1 1/2 cups whole wheat flour (or oat flour for gluten-sensitive dogs)
Optional add-ins for variety:
- 1 tablespoon peanut butter (xylitol-free only)
- 1/4 teaspoon cinnamon (small amounts are safe for dogs)
- 2 tablespoons plain Greek yogurt (for extra protein)
Critical safety note: Never use pumpkin pie filling, which contains spices and sugars that can harm dogs. Always check peanut butter labels to ensure they don’t contain xylitol, which is toxic to dogs.
Step-by-Step Instructions for Making Pumpkin Oat Dog Treats
Making these treats takes about 45 minutes from start to finish, with most of that time spent baking. The process is straightforward enough for beginners but produces professional-quality results.
Preparation steps:
- Preheat oven to 350°F and line a baking sheet with parchment paper
- Pulse oats in a food processor for 10-15 seconds to create a coarse flour texture
- Mix wet ingredients in a large bowl: pumpkin puree, egg, and any optional add-ins
- Combine dry ingredients in a separate bowl: processed oats, flour, and cinnamon if using
Assembly and baking:
- Gradually add dry ingredients to wet mixture, stirring until a firm dough forms
- Roll dough on a floured surface to 1/4-inch thickness
- Cut into shapes using cookie cutters or a knife (1-2 inch pieces work best)
- Place on baking sheet with 1/2 inch spacing between treats
- Bake for 20-25 minutes until edges are golden brown and treats feel firm
Cooling and testing: Let treats cool completely before offering to your dog. They should feel firm and dry, not soft or chewy. If treats seem too soft after cooling, return to oven for 5-10 more minutes.
How to Store Your Homemade Pumpkin Dog Treats with Oats
Proper storage keeps homemade treats fresh and safe for your dog to eat. Unlike commercial treats with preservatives, homemade versions have shorter shelf lives but maintain better nutritional value.
Room temperature storage: Place completely cooled treats in an airtight container for up to one week. Add a piece of bread to maintain slight moisture if treats become too hard.
Refrigerator storage: Extends freshness to two weeks in sealed containers. This method works best in humid climates where treats might become soggy at room temperature.
Freezer storage: Freeze treats for up to three months in freezer bags with air removed. Thaw individual portions as needed, or give frozen treats directly to dogs who enjoy the texture.
Signs treats have spoiled: Discard treats that develop mold, smell sour, or feel slimy. When in doubt, make a fresh batch rather than risk your dog’s health.
Customizing Your Pumpkin Oat Dog Treat Recipe
Basic pumpkin oat treats serve as a foundation for countless variations based on your dog’s preferences and dietary needs. Small modifications can create entirely different flavors while maintaining the nutritional benefits.
Protein variations:
- Replace egg with 1/4 cup unsweetened applesauce for dogs with egg allergies
- Add 2 tablespoons plain cooked chicken (finely shredded) for meat-loving dogs
- Mix in 1 tablespoon bone broth powder for extra flavor and joint support
Flour alternatives:
- Coconut flour: Use 1/2 cup instead of wheat flour (absorbs more liquid)
- Rice flour: Creates lighter texture, good for grain-sensitive dogs
- Chickpea flour: Adds protein but creates denser treats
Texture modifications: Add 2 tablespoons chia seeds for crunch, or substitute quick oats for smoother texture. For training treats, roll dough thinner and cut into pea-sized pieces that bake in 15 minutes.
Choose modifications based on your dog’s size and preferences. Large dogs can handle chunkier add-ins, while small dogs need smoother textures to prevent choking.
Common Mistakes When Making Homemade Pumpkin Dog Treats with Oats
Even simple recipes can go wrong without attention to key details. These common errors can result in treats that crumble, burn, or don’t appeal to your dog.
Ingredient mistakes:
- Using pumpkin pie filling instead of pure pumpkin adds harmful spices and sugars
- Adding too much liquid creates dough that won’t hold together when rolled
- Skipping the oat processing step leaves large pieces that don’t bind properly
- Using instant oats creates mushy texture instead of the desired firmness
Preparation errors:
- Rolling dough too thin makes treats that break easily and burn quickly
- Overcrowding the baking sheet prevents even cooking and browning
- Not preheating the oven leads to uneven baking and soggy centers
- Removing treats too early results in soft treats that spoil quickly
Storage problems: Storing treats while still warm creates condensation that leads to mold. Always cool completely before sealing in containers.
Nutritional Benefits of Pumpkin Oat Treats for Dogs
Understanding the nutritional value helps you determine appropriate serving sizes and frequency for your dog’s diet. These treats provide genuine health benefits beyond just taste satisfaction.
Digestive health support: Pumpkin’s soluble fiber helps regulate bowel movements and supports beneficial gut bacteria. The fiber content makes these treats particularly helpful for senior dogs with sluggish digestion.
Weight management: Each treat contains approximately 15-20 calories (depending on size), making them suitable for dogs on weight management programs when given in moderation.
Nutrient profile per average treat:
- Calories: 15-20
- Protein: 1-2 grams
- Fiber: 0.5-1 gram
- Fat: 0.5 grams
Feeding guidelines: Treats should comprise no more than 10% of your dog’s daily caloric intake. For a 50-pound dog, this means 3-4 treats per day maximum. Smaller dogs should receive proportionally fewer treats.
Troubleshooting Your Pumpkin Dog Treat Recipe
When treats don’t turn out as expected, specific adjustments can fix the problem without starting over completely. Most issues stem from ingredient ratios or baking conditions.
Dough too sticky to roll: Add flour one tablespoon at a time until dough becomes manageable. Wet hands or rolling pin with cold water to prevent sticking.
Treats crumble when cut: The dough needs more binding. Add one egg white or 2 tablespoons of the liquid ingredient you used. Mix gently and re-roll.
Treats burn on bottom but stay soft on top: Lower oven temperature to 325°F and bake longer. Use light-colored baking sheets, as dark pans conduct heat more aggressively.
Treats too hard: Reduce baking time by 5 minutes or add 2 tablespoons liquid to next batch. Some dogs prefer harder treats, so test with your pet before adjusting.
Uneven browning: Rotate baking sheet halfway through cooking time and ensure oven racks are positioned in the center of the oven.
Frequently Asked Questions
Can I use canned pumpkin for dog treats?
Yes, use plain canned pumpkin puree without added spices, sugars, or preservatives. Check the ingredient list to ensure it contains only pumpkin.
Are these treats safe for puppies?
Puppies over 12 weeks can eat these treats in very small amounts. Break treats into tiny pieces and limit to one small piece per day for young puppies.
How long do homemade pumpkin dog treats last?
Properly stored treats last one week at room temperature, two weeks refrigerated, or three months frozen in airtight containers.
Can dogs with grain allergies eat these treats?
Substitute oat flour and wheat flour with rice flour or coconut flour for grain-free versions. Oats contain avenin, which some grain-sensitive dogs cannot tolerate.
What size should I make the treats?
Cut treats appropriate for your dog’s size: pea-sized for small dogs, quarter-sized for medium dogs, and up to 2 inches for large dogs.
Can I double the recipe?
Yes, double all ingredients proportionally. You may need to bake in multiple batches depending on your oven and baking sheet sizes.
Why did my treats turn out too soft?
Soft treats usually need more baking time or contain too much liquid. Return to oven for 5-10 additional minutes until firm and dry.
Is it normal for treats to be hard when cooled?
Yes, properly baked treats should feel firm and dry when completely cooled. This texture helps them store longer without spoiling.
Can I add other vegetables to the recipe?
Sweet potato, carrots, or green beans work well in small amounts. Avoid onions, garlic, grapes, or other foods toxic to dogs.
How do I know if my dog likes the treats?
Most dogs show enthusiasm by wagging, sitting attentively, or eating treats immediately. If your dog ignores them, try adding a small amount of low-sodium chicken broth to the next batch.
Can I use steel-cut oats instead of rolled oats?
Steel-cut oats are too hard and don’t process well. Stick with old-fashioned rolled oats for best texture and binding.
Should I add salt to the recipe?
Never add salt to dog treats. Dogs get sufficient sodium from their regular food, and excess salt can cause health problems.
Key Takeaways
- Simple four-ingredient recipe creates healthy, digestible treats most dogs love
- Pumpkin provides digestive benefits while oats add protein and essential nutrients
- Proper storage extends freshness up to one week at room temperature or three months frozen
- Customization options allow you to adapt the recipe for dogs with allergies or specific preferences
- Cost savings of 60-70% compared to premium commercial treats
- Portion control matters – limit treats to 10% of your dog’s daily caloric intake
- Quality ingredients like pure pumpkin puree and xylitol-free add-ins ensure safety
- Troubleshooting common issues like sticky dough or soft treats requires simple ingredient adjustments
- Nutritional value supports digestive health and weight management when fed appropriately
Conclusion
Making Homemade Pumpkin Dog Treats with oats gives you complete control over your dog’s snack ingredients while providing genuine health benefits. This simple recipe transforms basic pantry staples into tail-wagging treats that cost a fraction of store-bought alternatives.
The combination of pumpkin’s digestive support and oats’ nutritional value creates treats that taste great and contribute to your dog’s overall health. With proper storage techniques, you can maintain a steady supply of fresh treats that your dog will eagerly anticipate.
Start with the basic recipe to gauge your dog’s preferences, then experiment with safe add-ins like peanut butter or cinnamon. Remember to adjust treat sizes for your dog’s breed and limit portions to maintain a balanced diet.
Your next steps: Gather the four basic ingredients, preheat your oven to 350°F, and start mixing your first batch. Your dog will appreciate the homemade care, and you’ll enjoy the satisfaction of creating something both delicious and nutritious.
SEO Meta Title: Homemade Pumpkin Dog Treats with Oats – Easy Healthy Recipe

Samuel Michael
I've have been involved in Backyard Farm for over 15 years, especially livestock and market gardening. I blog at my free Time and ive My most helpful thoughts on this blog.

