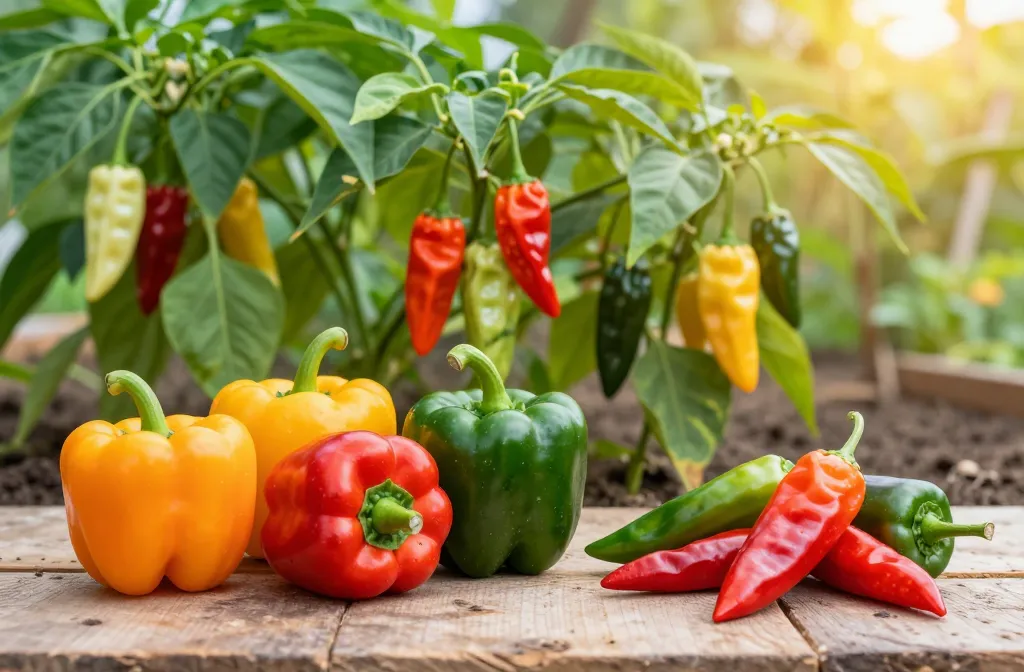
Tired of bland bell peppers from the grocery store? Craving that unique heat only a homegrown habanero can deliver? You absolutely can grow your own fantastic peppers, whether you dream of sweet snacking varieties or scorching super-hots. Ditch the store-bought mediocrity and prepare to cultivate a vibrant, flavorful, and incredibly rewarding pepper patch right in your backyard, or even on your patio. Let’s get those green thumbs working!
Choosing Your Pepper Posse: Seeds vs. Starts
First things first, how are you going to get your pepper party started? You have two main routes: starting from scratch with seeds or grabbing some already-established starter plants. Both have their merits, depending on your patience level and local nursery selection.
Seed Shopping Spree: What to Look For
Diving into the world of pepper seeds is like opening a treasure chest. You’ll find thousands of varieties, from classic jalapeños and colorful bells to exotic ghost peppers and Carolina Reapers. My advice? Don’t be afraid to experiment!
* Variety is the Spice of Life: Pick a mix of heat levels and colors. Sweet bells, mild poblanos, medium cayennes, and a couple of fiery habaneros make a great lineup.
* Reputable Sources: Buy seeds from trusted online retailers or local garden centers. Cheap, no-name seeds from sketchy marketplaces often lead to disappointment (and mislabeled plants!).
* Freshness Counts: Check the “packed for” date. Fresher seeds germinate better.
Starting from seed gives you the widest selection, allowing you to grow those super-rare varieties your neighbors have never even heard of. It also means you get to experience the entire lifecycle, which is incredibly satisfying.
Starter Plant Shenanigans: When to Cheat (Responsibly)
If you’re short on time, space, or just want to skip the germination phase, starter plants are your best friends. They’re a fantastic option, especially if you’re new to gardening.
* Healthy Habits: Look for sturdy, compact plants with deep green leaves and no yellowing or spots. Avoid leggy, pale plants – they’ve had a rough start.
* Pest-Free Zone: Inspect the undersides of leaves for any unwelcome guests like aphids or spider mites. You don’t want to bring those home!
* Root Check: Gently slide the plant out of its pot. You want to see a healthy network of white roots, not a dense, circling root ball (that’s a sign of a root-bound plant).
Buying starts is totally legitimate, IMO. It saves you weeks of indoor fuss and gets you closer to harvest time. Just make sure you’re picking strong, vibrant plants!
The Great Indoors: Starting Seeds Like a Pro
If you’re going the seed route, you’ll need to give your little pepper babies a pampered start indoors. Peppers are tropical plants, so they love warmth and light from day one.
Potting Mix Perfection: Don’t Skimp Here
Forget garden soil; it’s too heavy and potentially full of weed seeds and pathogens. You need a specialized seed-starting mix.
* Light and Fluffy: A good mix is fine-textured, sterile, and drains well while retaining moisture.
* Nutrient-Free (Mostly): Seedlings don’t need much fertilizer initially, as they get energy from the seed itself.
Fill small seed-starting trays or pots with your mix, sow your seeds about ¼ inch deep, and lightly cover them.
Heat Mat Hype: Is It Really Necessary?
Yes, it really is. Peppers are divas when it comes to germination temperatures. They absolutely adore warmth.
* Cozy Conditions: Aim for soil temperatures between 75-85°F (24-29°C). A heat mat placed under your seed trays provides this consistent warmth.
* Faster Germination: Without a heat mat, germination can be slow and sporadic, or not happen at all. With one, you’ll see sprouts in 7-14 days for most varieties.
Once your seeds sprout, you can usually remove them from the heat mat, as ambient room temperature is often sufficient for growth.
Light Up Your Life: Grow Lights and Their Importance
Once those tiny green shoots emerge, they immediately need light – and lots of it. A sunny windowsill simply won’t cut it for strong, stocky seedlings.
* Prevent Legginess: Without adequate light, seedlings stretch and become weak and “leggy” as they desperately reach for a light source.
* Bright and Close: Position your grow lights just a few inches above the tops of your seedlings. As they grow, adjust the lights upwards to maintain that close distance.
* Timer Time: Give your seedlings 14-16 hours of light per day. A simple timer makes this super easy.
Fluorescent shop lights (T5 or T8) work well for seedlings, but LED grow lights are also a fantastic, energy-efficient option.
Watering Wisdom: Not Too Much, Not Too Little
Watering is a delicate dance with seedlings. You want the soil consistently moist, but never waterlogged.
* Bottoms Up: Watering from the bottom (placing trays in a shallow pan of water) allows the soil to wick up moisture, preventing damping-off disease.
* Feel the Weight: Lift your trays. When they feel light, it’s time to water. Don’t let them completely dry out.
Harden Up, Buttercup! Acclimatizing Your Babies
Your pampered indoor seedlings are like teenagers who’ve never left their bedroom. They need to toughen up before facing the harsh realities of the outside world. This process is called “hardening off.”
* Gradual Exposure: Start by placing your seedlings in a sheltered, shady spot outdoors for just an hour or two on a mild day.
* Increase Time and Elements: Over 7-14 days, gradually increase their time outside and expose them to more sun, wind, and cooler temperatures. Bring them in at night, especially if temperatures drop below 50°F (10°C).
* Why It Matters: Skipping this step is a recipe for disaster. Your plants will get sun-scalded, wind-whipped, and generally stressed, potentially stunting their growth or even killing them.
Think of it as sending your kids to summer camp. They’ll come back stronger, I promise.
Outdoor Oasis: Planting for Pepper Paradise
Once the danger of frost has passed and your plants are hardened off, it’s time for the main event: planting them in their permanent home.
Location, Location, Location: Sun is King
Peppers are sun worshippers. They need at least 6-8 hours of direct sunlight per day to thrive and produce abundantly.
* South-Facing Spot: If possible, choose a south-facing garden bed or patio area.
* Avoid Shade: Don’t plant them where they’ll be shaded by taller plants, fences, or buildings for a significant portion of the day.
Soil Goals: Amending for Success
Peppers love well-draining, fertile soil with a slightly acidic to neutral pH (6.0-7.0).
* Organic Matter is Gold: Amend your garden beds with plenty of compost or well-rotted manure. This improves drainage, aeration, and nutrient content.
* Raised Beds Rock: If your soil is heavy clay, consider raised beds filled with a good quality garden soil mix.
Spacing Out: Give Them Room to Breathe
Don’t crowd your plants! Good air circulation helps prevent fungal diseases and allows each plant to get enough light and nutrients.
* General Rule: Space pepper plants 18-24 inches apart. This might seem like a lot when they’re small, but they grow!
Companion Planting: Friends with Benefits
Some plants are great neighbors for peppers, potentially deterring pests or improving growth.
* Good Companions: Tomatoes (though keep them a little separate as they are heavy feeders), carrots, cucumbers, radishes, marigolds (for pest deterrence), and basil.
* Avoid: Beans, kale, and fennel are generally not great companions for peppers.
Water, Feed, and Protect: Keeping Your Peppers Happy
Once your peppers are in the ground, your job isn’t over. Consistent care is key to a bountiful harvest.
Hydration Station: How Much Water, When
Peppers need consistent moisture, especially when flowering and setting fruit.
* Deep and Infrequent: Water deeply when the top inch or two of soil feels dry. This encourages roots to grow deeper, making plants more drought-tolerant.
* Avoid Wet Leaves: Water the soil directly, not the leaves, to reduce the risk of fungal diseases. Drip irrigation or soaker hoses are fantastic for this.
* Container Care: Peppers in containers dry out much faster and may need daily watering during hot weather.
Nutrient Nurturing: Fertilizing Schedule and Types
Peppers are moderate feeders. They need a balanced diet, but too much nitrogen can lead to lush foliage at the expense of fruit production.
* Initial Boost: A balanced organic fertilizer when planting.
* Fruiting Phase: Once flowers appear, switch to a fertilizer higher in phosphorus and potassium (the “P” and “K” in NPK numbers, like 5-10-10 or “tomato food”).
* Less is More: Don’t over-fertilize. Follow package directions, and remember that healthy soil with good compost often provides many nutrients.
Pest Patrol: Common Invaders and Organic Solutions
Every gardener battles pests. Stay vigilant!
* Aphids: Small, soft-bodied insects that cluster on new growth. Blast them off with a strong stream of water or use insecticidal soap.
* Spider Mites: Tiny, almost invisible mites that cause stippling on leaves and fine webbing. Increase humidity and use insecticidal soap.
* Hornworms: Large, green caterpillars that can defoliate a plant overnight. Hand-pick them off (they’re surprisingly good at camouflage!).
* Prevention is Key: Healthy plants are more resistant. Encourage beneficial insects like ladybugs.
Support Systems: Stakes or Cages for Heavy Producers
Some pepper varieties, especially larger bell peppers or prolific producers, can get quite top-heavy with fruit.
* Prevent Breakage: A simple stake or a tomato cage can provide much-needed support, preventing branches from snapping under the weight of ripening peppers.
* Better Airflow: Keeping plants upright also improves air circulation, which helps prevent disease.
The Big Payoff: Harvesting Your Fiery Treasures
This is the moment you’ve been waiting for! Picking your own peppers is incredibly satisfying.
* When to Pick: Most peppers are edible when green, but they develop their full flavor, color, and heat (for spicy varieties) when fully ripe. This usually means they’ve changed color (red, yellow, orange, brown, etc.) and feel firm.
* Don’t Be Shy: Picking peppers encourages the plant to produce more. Don’t leave ripe peppers on the plant too long.
* How to Pick: Use clean pruning shears or a sharp knife to cut the stem just above the pepper. Avoid pulling, which can damage the plant.
* Storage: Store fresh peppers in the crisper drawer of your refrigerator. They’ll last for 1-2 weeks. You can also freeze, dry, or pickle them for long-term enjoyment.
Frequently Asked Questions
Why are my pepper plants not producing fruit?
This is a common frustration! Several factors can cause this. Extreme temperatures (too hot or too cold) can cause flowers to drop before setting fruit. Lack of pollination is another culprit; sometimes a gentle shake of the plant or brushing flowers with a small paintbrush helps. Also, too much nitrogen fertilizer can lead to lush green leaves but no fruit. Ensure consistent watering and adequate sunlight.
Can I grow peppers in containers?
Absolutely! Peppers are excellent container plants. Choose a pot at least 5 gallons (around 12 inches in diameter) for most varieties, larger for bigger types. Use a good quality potting mix, ensure excellent drainage, and be prepared to water more frequently than garden-planted peppers, especially in hot weather.
How often should I water my pepper plants?
It depends on your climate, soil type, and whether they’re in the ground or containers. Generally, aim for consistent moisture. Water deeply when the top 1-2 inches of soil feel dry to the touch. In hot, sunny weather, this might be daily for container plants, or every 2-3 days for in-ground plants. Avoid letting them completely dry out, but also don’t keep them constantly soggy.
What’s the deal with blossom end rot?
Blossom end rot appears as dark, sunken spots on the bottom (blossom end) of your peppers. It’s not a disease, but a calcium deficiency in the fruit, often caused by inconsistent watering, which prevents the plant from transporting calcium effectively. Ensure consistent soil moisture and avoid extreme wet/dry cycles. Sometimes a calcium supplement can help, but consistent watering is usually the fix.
Do I need to prune my pepper plants?
Pruning isn’t strictly necessary for peppers, but it can be beneficial. Some gardeners “top” their plants when they’re young (pinch off the main growing tip) to encourage bushier growth and more side branches, which can lead to more fruit. Remove any leaves touching the soil to prevent disease, and prune away non-productive branches or those that are shading out fruiting areas.
My peppers aren’t spicy, what gives?
Several factors influence pepper heat. Genetics are primary, so if you planted a mild variety, it won’t suddenly become a ghost pepper. However, stress (like inconsistent watering, extreme heat, or nutrient deficiencies) can sometimes increase capsaicin production, making peppers spicier. Some growers believe slightly stressing plants by reducing water just before harvest can boost heat, but don’t overdo it!
The Spicy Conclusion
There you have it – your roadmap to a fantastic pepper harvest! Growing peppers is an incredibly rewarding journey, from tiny seed to fiery fruit. You’ll learn, you’ll experiment, and you’ll definitely enjoy the fruits of your labor (literally!). Don’t be afraid to try new varieties, tweak your methods, and share your successes (and maybe a few delicious peppers) with friends. Happy growing, fellow pepperhead!
Sam Michael
Sam Michael is a passionate agricultural educator and sustainable farming advocate with over fifteen years of hands-on experience in modern and traditional farming practices. As the founding creator of Farming for Beginners, Sam has dedicated his career to making agricultural knowledge accessible to aspiring farmers of all backgrounds and experience levels.


