Companion planting is like giving your garden a friendly support team. If you set the right plants next to each other, you can cut pest pressure, boost growth, and make your beds easier to manage. I love how it turns “random planting” into a plan you can repeat. It also helps beginners avoid common mistakes like pairing plants that don’t get along. When you use companion planting layouts, you’re not just hoping for results—you’re stacking the odds in your favor with proven pairings and smart bed design. Let’s build 10 practical layout ideas you can try right away.
Key Takeaways
- Companion planting works best when you start with reliable pairings from crop-based charts (and avoid “combative” combinations).
- Great layouts use roles like trellis partners, border pest defenders, nitrogen helpers, root-depth partners, and flower support.
- Design for airflow, sunlight, and root-zone variety so plants don’t compete or shade each other too much.
- Treat layouts like modules you can rotate each season to keep soil healthy and reduce pest buildup.
- You can start small: one bed, a few compatible crops, and a simple border or flower “island” is enough.
Quick Answer
Here are 10 companion planting layout ideas I use to plan beds that actually work: trellis pair strip, herb-edge border, root-zone partnering blocks, nitrogen helper cluster (legumes), flower + vegetable mat, crop-family neighborhoods, zone rotation plan, trap-crop edges, succession-friendly companion strips, and “one-bed system” design for small gardens.
What You Need
| Item | Purpose | Notes |
|---|---|---|
| Companion planting chart (by crop) | Choose reliable partners and avoid conflicts | Use multiple charts if you want extra confidence, since compatibility can vary by source. |
| Pen + paper or garden notes app | Track your layout and rotations | Write down what you planted where so next season is easier. |
| Measuring tape + string/markers | Plan spacing and bed zones | Even rough spacing helps prevent overcrowding. |
| Compost and basic soil amendments | Support healthy growth for all plants | Companion planting helps, but plants still need nutrients and drainage. |
| Seedlings or seeds (main crops + companions) | Build your planned combinations | Start with 2–4 combos you trust, then expand. |
| Mulch (optional) | Reduce weeds and stabilize soil moisture | Mulch also helps keep soil microbes happier. |
| Labels/plant tags | Identify plants fast for inspection | Especially useful when herbs and flowers grow similarly. |
Step 1: Start With Reliable Companion Pairings (So Your Layout Actually Works)

Before I place a single seedling, I pick my “main crops” and then look up what they pair with using a crop-based companion planting chart. That’s the easiest way to avoid accidental combative pairings—those are the combos that can stunt growth or make pest problems worse.
Here’s what I do:
- Pick your main crops first. Examples: climbing beans, tomatoes, broccoli/cabbage family, carrots, peppers, or squash.
- Check companion charts for each main crop. Look for “companions” that show up repeatedly for that crop.
- Notice the recurring helpers. In many charts, herbs and flowers like basil, parsley, garlic, onions, and sunflowers show up as frequent supporters across lots of vegetables.
- Write “planting rules” for each bed. I keep it simple:
– Must-have companions (the ones I want) – Must-avoid combinations (the ones I won’t place nearby)
For example, if I’m growing beans, charts often recommend a trellis-style setup with corn as a natural upright support partner (and other companions that help attract beneficial insects). And if I’m growing plants in families like brassicas (broccoli/cabbage), I group them carefully so I’m not mixing in something that conflicts.
Step 2: Layout Idea #1 — The “Trellis Pair” Strip (Vertical Support + Companion Benefit)
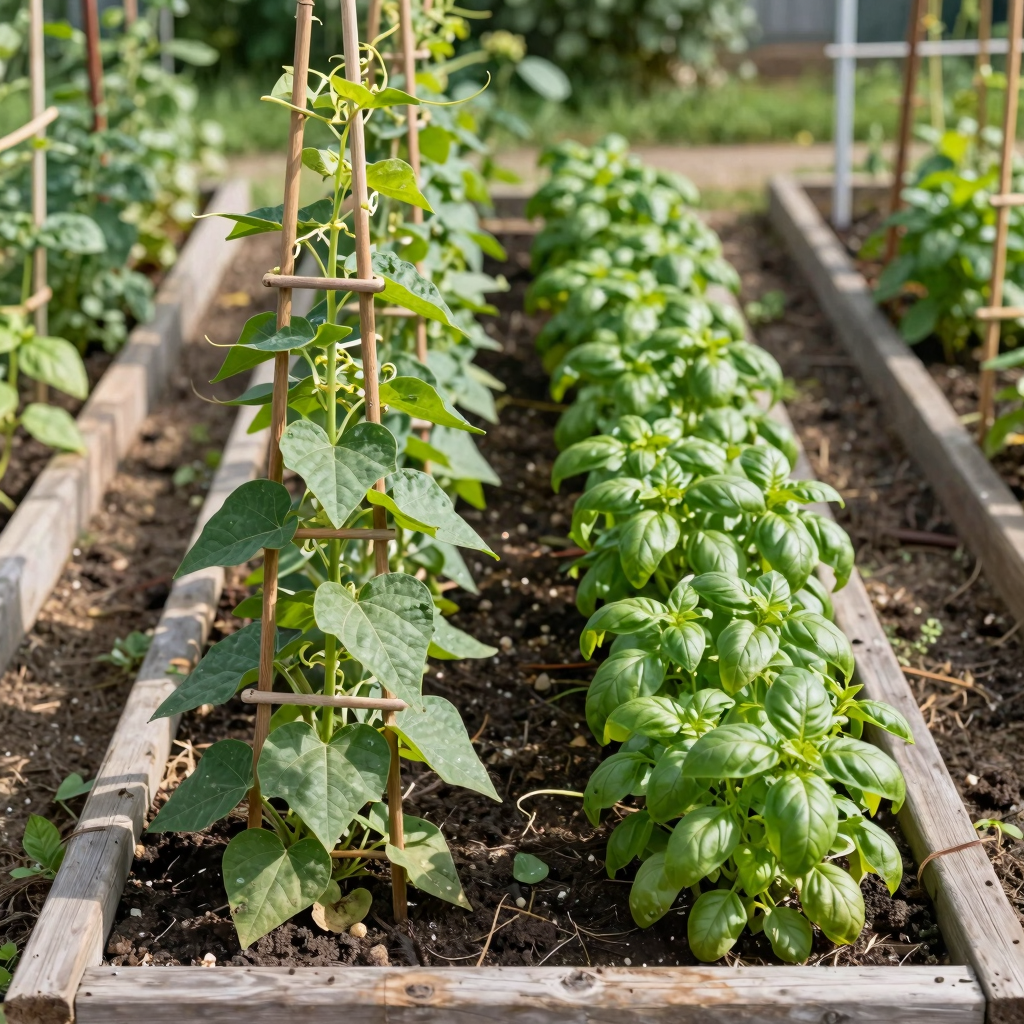
This is one of my favorite layouts because it’s both useful and space-saving.
How I build it:
- Choose a climbing crop that needs support—like beans.
- Add the “matching” taller companion that works as a structure. Many companion charts point to corn as a natural trellis partner for climbing beans.
- Place the taller plants so they don’t shade the low growers too much. I aim for a side-by-side arrangement with airflow in mind.
- Plan spacing so the climbers aren’t crowding each other. Climbing plants need circulation to stay healthier.
Why it works: You get vertical space use, better light organization, and the companion pairing is based on guidance from companion charts rather than guesswork.
Step 3: Layout Idea #2 — The “Herb-Edge Border” (Quick Pest-Defense Perimeter)

If you’ve ever walked the edge of a bed and watched pests work their way in, you already get the idea behind this layout. I like using herb and flower companions where pests “arrive first.”
How I build the herb-edge border:
- Pick a handful of companion herbs/flowers recommended across charts—think basil, parsley, garlic, onions, and low flowers.
- Place them along the edges and entrances to the bed (not just randomly).
- Keep the border easy to reach so I can inspect plants and harvest without trampling the bed.
- Add a simple rotation plan so the border doesn’t become a monoculture every year (more on rotation later).
My practical tip: Think of the border as a “navigation system” for beneficial insects and pollinators. It also makes the garden feel more organized, which makes me more likely to maintain it.
Step 4: Layout Idea #3 — The “Root-Zone Partnering Blocks” (Deep + Shallow Neighbors)

This one is all about how plants share (or steal) nutrients underground.
Research-backed garden design often highlights the value of root-zone diversity—plants with different root depths can use nutrients at different levels. For example, taproot plants like carrots and parsnips can draw from deeper soil, while shallow-root plants benefit from what’s available near the surface.
How I set up root-zone blocks:
- Choose one “deep-root” plant (like carrots or parsnips).
- Pair it with a shallow-root neighbor (many leafy greens or other common garden crops).
- Group them as a block (a repeated mini-layout), so you’re not randomizing root depth across the bed.
- Still check spacing and light: root depth doesn’t cancel out the need for airflow.
Why it works: It helps reduce competition while making the most of your soil’s nutrients. And it keeps planting organized, which saves time.
Step 5: Layout Idea #4 — The “Nitrogen Helper Cluster” (Legumes as Bed-Improvers)

Legumes (like peas and beans) often get mentioned as helpers because they can improve nitrogen availability in the soil. That’s a big deal for crops that are heavier feeders.
How I use the nitrogen helper cluster:
- Pick peas or beans as the nitrogen-support role.
- Place them near or within areas where other plants need steady growth (like leafy greens, brassicas, or tomatoes depending on your bed plan).
- Make it a cluster, not just one plant—so their benefit is more likely to spread across the bed.
- Rotate legumes through the garden over time so you don’t rely on the same spot season after season.
Companion check: Use your chart to confirm what legumes play nicely with. This keeps the cluster from becoming a “fertility boost” that accidentally pairs with a combative neighbor.
Step 6: Layout Idea #5 — The “Flower + Vegetable Mat” (Attract Beneficials While Keeping the Garden Productive)

I love this layout because it turns “decorative plants” into active helpers, without giving up productive space.
How I make a flower + vegetable mat:
- Choose companion flowers that appear in many charts—sunflowers are a classic example because they’re listed as companion-friendly for a wide range of crops.
- Intermix flowers with vegetables in small islands or a scattered pattern inside the bed, not only at the perimeter.
- Layer plant heights so tall flowers don’t block light from shorter vegetables.
- Keep it manageable: I usually start with one bed where flowers take up a modest portion, then adjust based on what I see.
Why it works: You’re creating habitat for beneficial insects while still keeping the garden productive. Plus, flowers make it easier to notice plant health changes because you’re visiting more often.
Step 7: Layout Idea #6 — The “Crop Family Neighborhoods” (Fewer Conflicts, Easier Maintenance)

This is how I reduce stress in the garden. Instead of mixing every plant type together, I group vegetables with similar needs and compatible companions.
How I build neighborhoods:
- Pick a “neighborhood” crop family (examples: brassicas like broccoli/cabbage, or nightshades like tomatoes/peppers).
- Use a companion chart to confirm which companion plants work for that family.
- Design each neighborhood as a self-contained zone—so you can weed, water, and inspect without running across the whole garden.
- Leave clear paths between neighborhoods so maintenance doesn’t become a chore.
Why it works: Less mixing = fewer accidental conflicts = simpler troubleshooting when something goes wrong.
Step 8: Layout Idea #7 — The “Zone Rotation Plan” (Companion Layout That Survives Seasons)

Companion planting isn’t meant to be “set it and forget it forever.” I treat my layout like a seasonal system.
How I rotate with purpose:
- Think of each companion arrangement as a module (trellis pair strip, herb border, nitrogen helper cluster).
- Rotate the main crops each season while keeping the roles in mind.
- Re-check compatibility when you change main crops—charts can help you confirm what still works.
- Keep notes: I track pest pressure and what thrived so I’m not guessing next year.
Simple rule I use: Border herbs stay consistent in role, but the main crop “moves” to a new bed or new neighborhood. That helps reduce repeat pest problems in one exact spot.
Step 9: Layout Idea #8 — The “Trap-Edge + Refuge Center” Setup

This layout is a practical twist I use when I know a particular pest tends to show up.
How I do it:
- Identify what pests are most likely in my area (for example, leafy pests vs. caterpillars).
- Use chart guidance to pick border plants that can attract pests away from the main crop (or at least slow their progress).
- Put the main crop toward the center or in a zone with strong “refuge” companions (herbs/flowers that support beneficial insects).
- Walk the border more often early on, because that’s where you’ll see the first signs.
Why it works: It turns the border into an observation point and a “buffer,” which makes it easier to catch problems early.
Step 10: Layout Idea #9 — The “Succession-Friendly Companion Strips”

If you want a garden that stays productive (and doesn’t leave gaps), this layout helps me plan for multiple planting dates.
How I set it up:
- Choose one or two companion plants that can stay longer (like certain herbs).
- Plant main crops in strips so you can stagger sowing dates (quick crops first, longer crops later).
- Make sure the companion plants are compatible across your whole succession window using a chart.
- Leave space for growth so later plantings don’t get crowded.
Why it works: You keep benefits (like insect-attracting flowers or border herbs) while continuously refreshing the main crops.
Step 11: Layout Idea #10 — The “One-Bed System” for Small Gardens
If you only have one bed (or even a few containers), you can still do companion planting layouts—you just scale the design down.
How I build a one-bed system:
- Pick 6–10 plants total (not 25). I keep it simple so I can manage it well.
- Assign roles:
– One trellis or vertical support area – A herb/flower edge or mini border – One nitrogen-helper spot (peas/beans) if it fits your crops – A root-depth partner (like carrots near something shallow-root)
- Create a simple internal structure: an edge border + one or two “islands” inside the bed.
- Check for combative pairings before finalizing. This matters even more in small beds because there’s less distance to “fix” a bad match.
Why it works: Small gardens need clarity. When I assign roles, I don’t overthink every plant.
Tips
- Start with 2–3 reliable pairings instead of trying to design the “perfect” garden on day one. You’ll learn faster.
- Always confirm compatibility using charts—different sources may list different “combative” warnings.
- Layer by height. Put taller plants where they won’t shade low crops (especially with sunflowers and tall companions).
- Plan for airflow. Companion planting doesn’t stop mildew or pest spread if plants are crowded.
- Use repeats. A simple module (like a trellis pair strip) repeated across your beds makes layouts easier to manage.
- Walk your garden often. Companion planting helps, but early detection still makes the biggest difference.
FAQ
What is the best way to start companion planting if I’m a beginner?
I start by choosing 2–4 main crops and looking up their companion plants using a crop-based chart. Then I design one bed with a simple structure: one border (herbs/flowers) plus one “role” layout (like a trellis pair or nitrogen helper cluster). That’s it—no complicated web of every plant.
Do I have to avoid “combative” companion pairings?
Yes. Many companion planting charts separate compatible and combative combinations. If a pairing is marked combative, I avoid placing them close together, especially in small beds where there’s less space.
Can companion planting replace pest control chemicals?
It can reduce pest pressure for many gardens, especially by supporting beneficial insects and encouraging healthier plant growth. But it’s not magic. I still monitor plants and use physical methods (like inspecting leaves, hand-picking pests, and using row cover when needed).
How far apart should companions be?
Use the spacing from seed packets or transplant labels, then adjust so companions don’t crowd the main crop. The key is to keep airflow and light. If you overcrowd, pests and disease can spread even if the plants are “compatible.”
Should I rotate my companion planting layout each year?
I recommend rotating main crops each season. Keep companion roles in mind, but move the main crops so pests don’t get comfortable in one exact spot and so soil nutrients don’t get depleted.
Conclusion
Companion planting layouts are how I turn “good ideas” into a garden that’s easier to grow and more fun to manage. The biggest win is starting with reliable chart-based pairings, then building your beds with clear roles like trellis strips, herb borders, root-zone blocks, nitrogen helper clusters, and flower islands. From there, you can repeat modules, rotate over seasons, and fine-tune based on what you see in your own garden. If you try one or two layout ideas this week, you’ll already be building the skills that make companion planting work long-term—so go ahead and design your next bed with confidence.

Samuel Michael
I've have been involved in Backyard Farm for over 15 years, especially livestock and market gardening. I blog at my free Time and ive My most helpful thoughts on this blog.
